About a month ago my MacBook Pro started to really slow down. Kind of a disappointment because it is only a mid-2012 model, and I’m hoping to get a year or two more out of it. I then realized that with all of the photos/videos I take of Caleb, plus the movies and tv shows I download…I only had about 30GB left on the 750GB drive that came with the laptop. So I figured it was time to upgrade my hard drive on my MacBook Pro.
I did this back in 2010 with my late-2008 model MacBook Pro, and it worked so well, I figured I would follow a similar process to upgrade the hard drive on my mid-2012 model MacBook Pro.. I physically replaced the hard drive in about 5 minutes, but the prep work to get the drive ready took a bit longer than that. Let me walk you through what I did. But first, here are the things you’ll be needing:
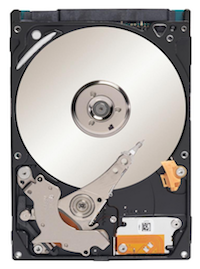
- Your new hard drive. I would recommend the Seagate 1TB Solid State Hybrid Drive. These drives are amazing and I haven’t had any problems with them. They’ve made both computers I’ve used them in operate so much faster. And for only $95, you can’t go wrong.
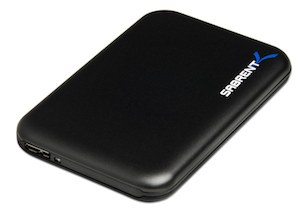
- A hard drive enclosure. I hadn’t used this before, but this was super handy for doing the upgrade. I went with the Sabrent Aluminum Enclosure, which I really liked. The best part is I can throw my old hard drive in it once I wipe it, and then I have a very small, portable, external hard drive.
- A Phillips 00 screwdriver (for taking the screws out of the bottom of your MacBook Pro)
- A T6 Torx Screwdriver (for removing the retaining posts)
- A spudger (iFixit recommends using one of these to detach the battery; I used my fingers, but a spudger would have been easier). I will say that there are some precision toolkits that you can buy that have all of these things (the spudger, Phillips 00 and T6 Torx) that might be cheaper than buying them individually.
- And here is the iFixit tutorial that will tell you exactly what you need to do.

Once you have all the supplies, this is how I did everything, and found it to be quite easy.
- After installing my new hard drive into the hard drive enclosure, I plugged it into the computer and saw that it was recognized as an external drive.
- I went into Disk Utility, and erased the new Seagate hard drive, choosing the Mac OS Extended (Journaled) format.
- Then I went into the App Store, and downloaded the OS X Mavericks install file, and once it was downloaded, double-clicked on it to start the process.
- Then it asked me on what drive I wanted to install OS X Mavericks on, and I chose the new Seagate drive.
- After it completed installing, I could then choose that drive to use as a Startup Disk. To do that, simply restart your computer, and hold the Option key down on the keyboard. It will give you an option of which disk to use as your Startup Disk. I chose the new Seagate drive, and then I could get into my “new computer” but my old hard drive (with all of my stuff on it) was still accessible.
- I dragged over documents, my iTunes library, iPhoto library, fonts I use, and then between IMAP email, Dropbox, Evernote and other Cloud services, everything else simply synced over.
- Once the drive was just how I wanted it, I shut down the computer, and follow the iFixit instructions here for installing the new hard drive.
- I’ll keep my old drive in the hard drive enclosure for a week or so, just to make sure I don’t need anything off that drive, and then I’ll wipe it and use it as an external hard drive for videos/movies.
And one thing to remember throughout the whole process:Â Google is your friend. Just type your question about any of these steps, and you’ll find a good tutorial.
Hopefully that is helpful if you’re considering doing a hard drive upgrade like this. I would highly recommend it, as my computer now has more space to get me through the next year or so, and it is operating SO much faster – feels like a brand new computer. Let me know if you have any questions.